How to create and manage your blogs

Blog Articles are a fantastic way of providing fresh content to your website and users on topics relevant to your business and industry. They are a great opportunity to share news and information, open dialogues and engage with your target audience. Your EOS website comes fully furnished with a Blog collation tool, allowing you to create, manage and publish blog articles to your website.
Browsing your Blog Articles
To view your blog articles you will first need to go to the “Content” tab on your EOS CMS Control Panel where you will see will see a column for "Blog" with a "Browse" tab.
When you click "Browse" you will be taken to your blog management screen where you will see a list of all your blog posts which you can click to edit, view or delete.
You can search your articles by keyword or scroll through to browse.
Creating a new Blog post
To create a new Blog post you will first need to click "New Entry". Once you do this you will be taken directy to the editing page for this new entry. The first thing you should do is give your article a title, then click update in the top right hand side. You can then continue to create your article.
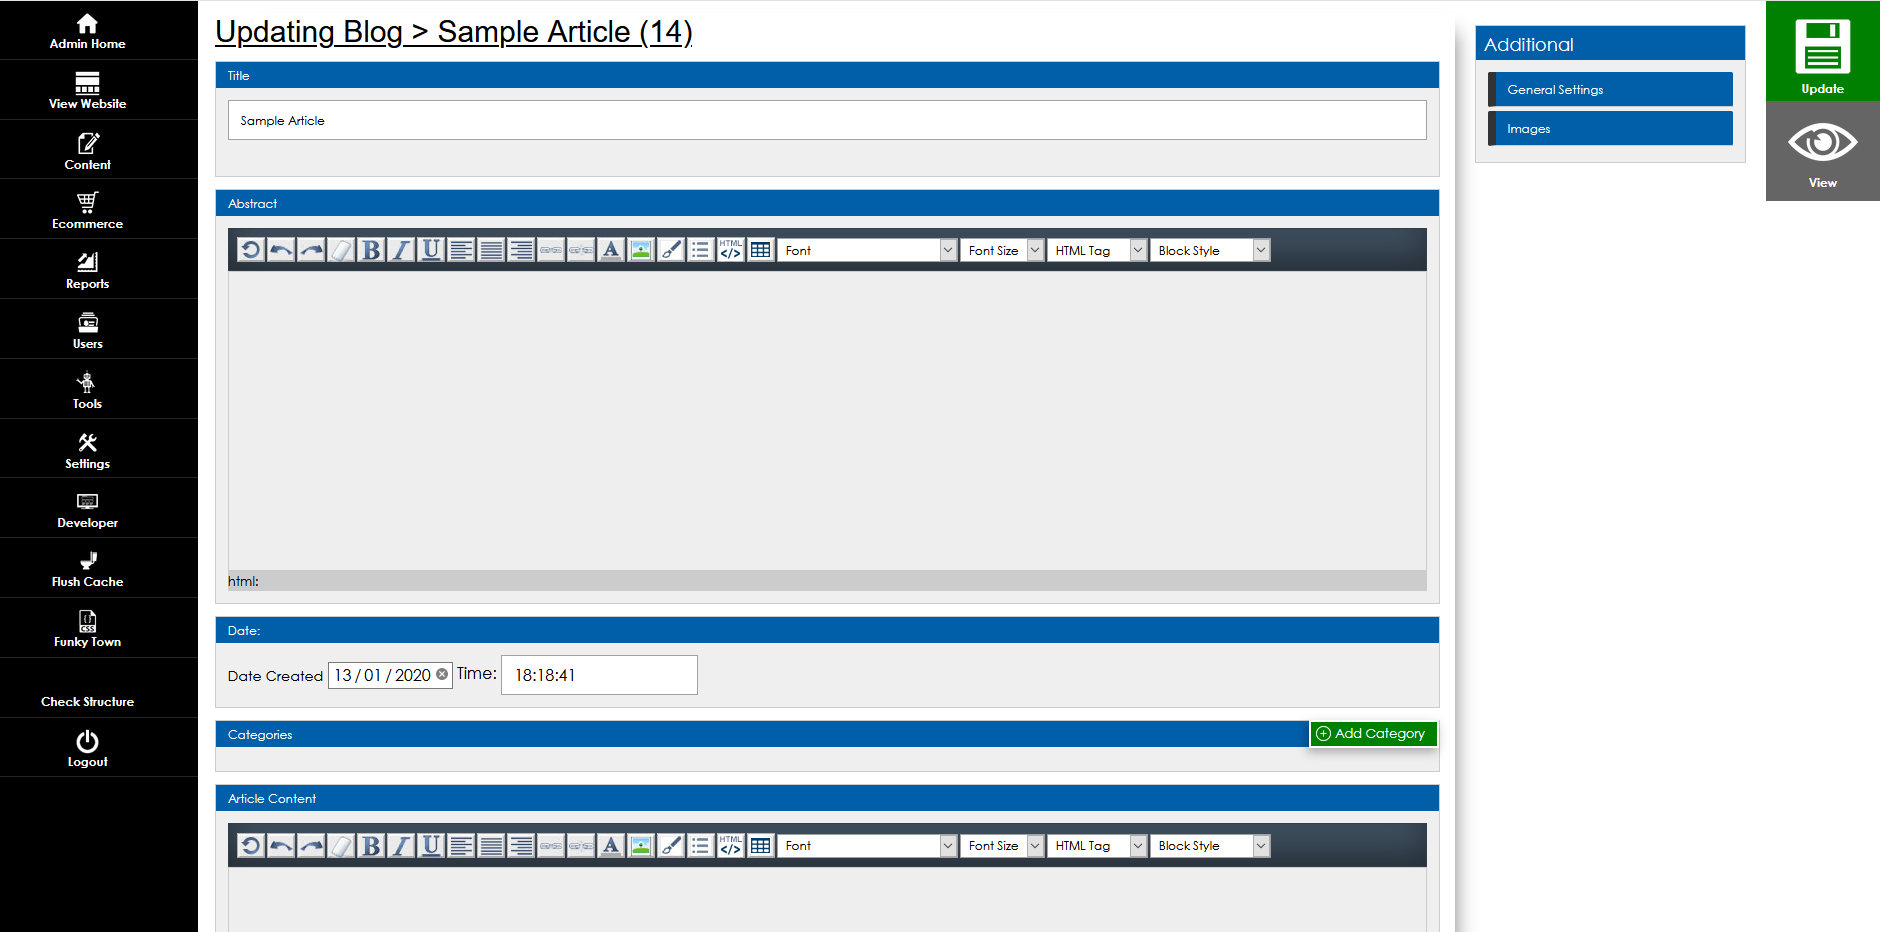
When editing a blog post, you will find a series of content features. Your editing features may vary depending on the template, style and structure of your website but generally you will have a combination of the following sections.
- Blog Post Title
- Abstract- summary description used when viewing blog articles in category
- Icon - used when viewing blog articles in category
- Author
- Date / Time
- Categories
- Main Image - used for blog post view
- Article Content
- SEO Overrides
- Show/Hide Controls
- Outer Template Selection
When editing a Blog post, you will always have the option in the top right-hand side Update or View the listing. When you click to update the listing, you can click view to see the changes you have made. (if you already have the page open you can also simply refresh the page to see the changes)
Lets take a look at these features and what they can be used for
The blog title is the heading for the listing that your users will see. This should be descriptive of the content using relevant keywords - (this will also create the URL for the webpage.
Here you can provide a brief summary of your post which will be displayed in the category summary view of your blog. The aim of this is to briefly communicate the content of the post to attract users to click through to view the full post.
The listing icon appears in the category view with the abstract. This will not appear on the main listing page, this is simply to display as a preview thumbnail when users are browsing your article listings. (This can be found in the right hand side images tab)
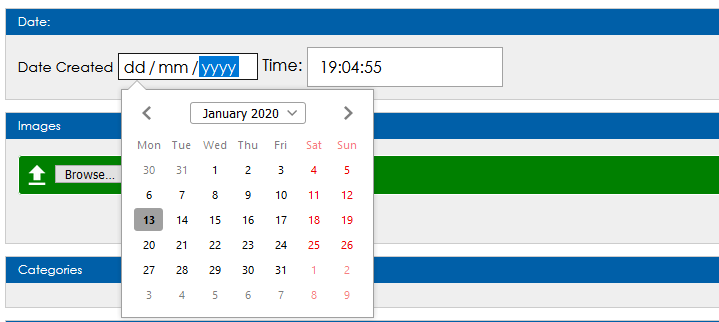
This feature will display the creation date and time (optional) of the blog post. You can change this by clicking into the date and selecting from the calendar.
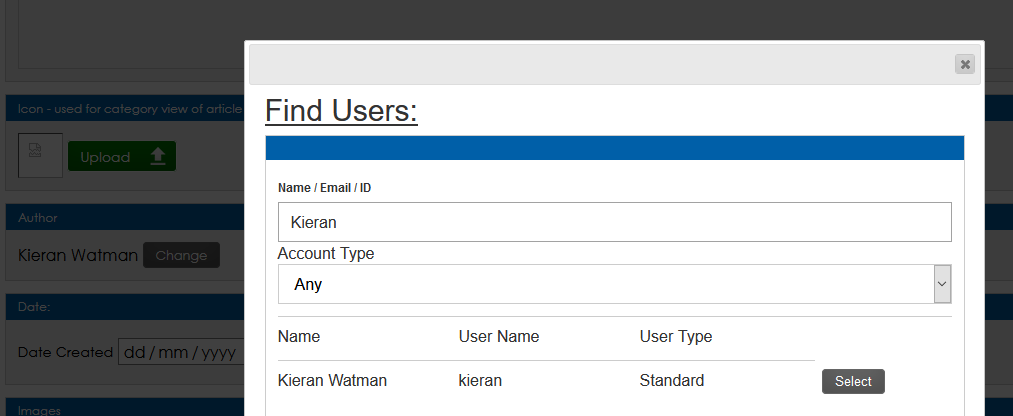
Your readers will want to know who is posting the article. By default, when creating a new post, the Author will be automatically set to you as the logged in user. Using your Author tool you can choose which of your admin users to display as the author of the post by clicking "Change" and then search and select a new user.
Your listings can be divided into categories to help your users browse through topics or specific types of articles. Here you can add your post to the relevant categories by clicking "Add to Category". You will then see a popup menu with the available categories.
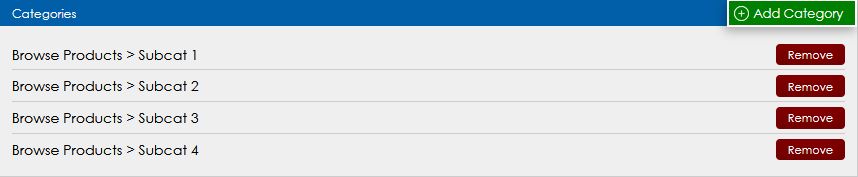
In the pop up menu, you will have a search box to find the relevant category you would like to add the listing to. Or you can browse through your categories in the available list. Any categories that have sub-categories will have an "Expand" button next to them so you can click to view these also. Simply click select to add to a single category, or to add to multiple categories at once, simply tick the relevant boxes and click "Add All Checked".

Important Training Note: You must create the categories in your admin before you can add listings to them
This tool allows you to upload a main header image to your post. The required dimensions will be indicated on your upload tool. You can browse and upload images from your computer/device. Be sure to use good quiality images to best showcase your article, products or services. You do have the option of uploading multiple images into a gallery style display. The settings of your Main image component will be defined by your developer to best suit the use and context.

This is the area that allows you to add the main text and image content to your page. Every content area across your website uses a content editing toolbar, similar to what you would use when editing emails or documents, featuring Bold, Italic, Underline controls, image uploads, font colours, formatting, sizes and so on.
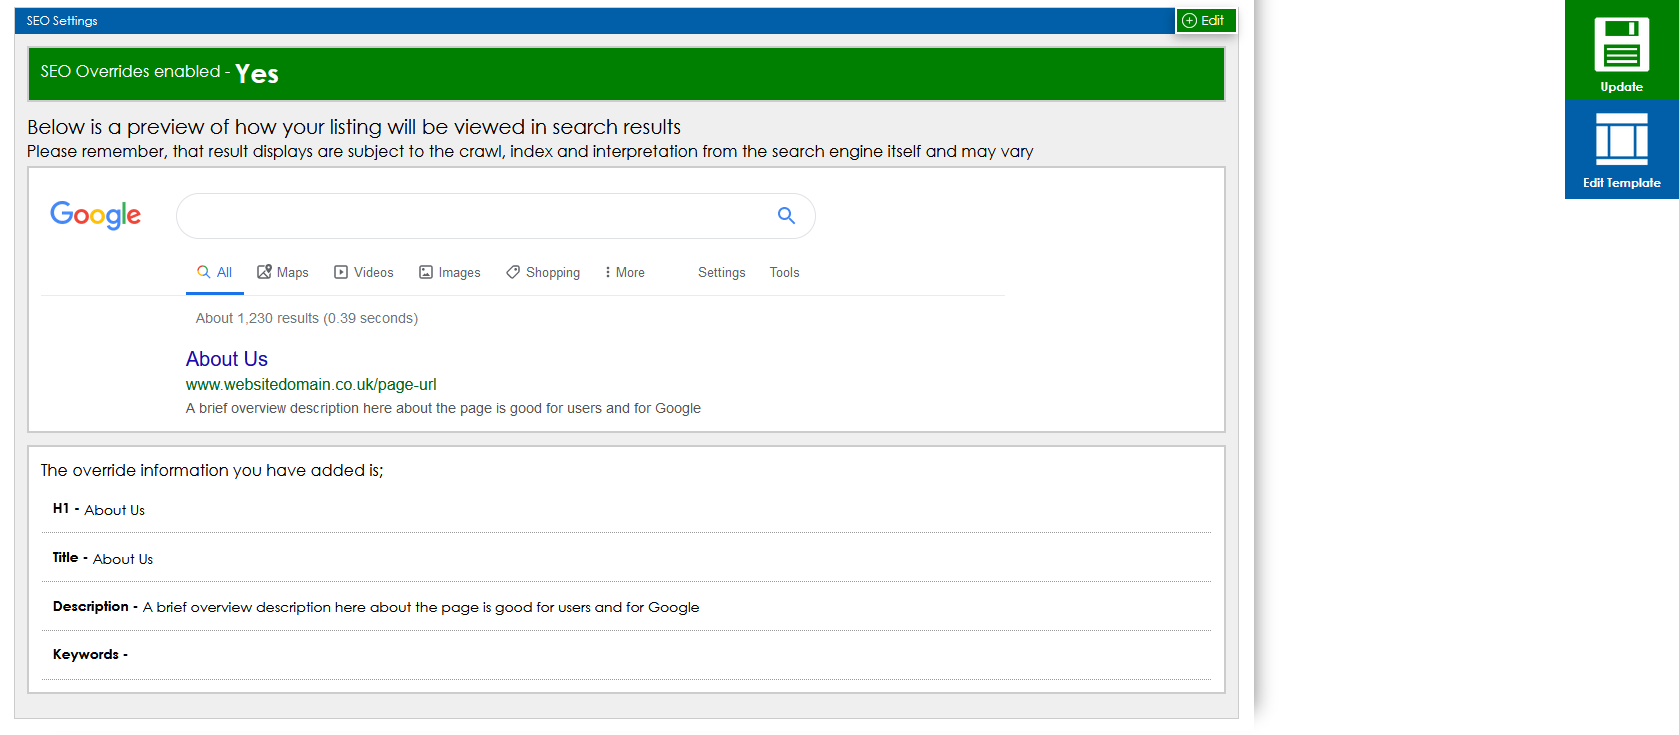
The SEO Overrides button allows you to create custom Title Tags and Meta Descriptions. There are a number of important SEO controls available for every page on your website for targeted SEO Campaigns. By default, the EOS CMS will use the Page Titles and first part of your on-page content as the SEO Data that Google will read, however, you may wish to override this using this feature. The CMS will also give you a preview of how your result will appear in search engines once indexed. To activate and use your SEO Overrides for your page simply click the edit button which will open the overrides pop up. Tick "Enable" to activate and then you can fill in your data and settings as required.
Clicking to Show or Hide a page on your website determines whether it is available for public viewing. Please bear in mind that if you hide a page, anyone who visits this page will receive a “Page not found” 404 error, so this should only be used if no links to the page are available on your website menus. Ticking the box and clicking update will hide the page from your website. If the box is unticked, it is visible to your users.
This dropdown allows you to choose which outer template your page should use. You may have various sections of your website that have different styles/formats and this tool will tell your page which of those sections to use for its outer template. This tool is used only for websites with multiple templates available. At the time of your website development, you will be advised if you require multiple outer templates. Please contact us if you are unsure about this feature.
Here are some additional tools you may find as part of your editing page.
Page Templates that have a gallery option allow you to upload a series of images into a page gallery. You simply click to Upload images, select from your computer/device folder and upload. Once loaded in you will have the ability to edit the titles for each of these images. Preferred dimensions for the images will be given, however, images will be scaled to suit the best fit of the on-page gallery. You can also drag and drop to reorder images.
The File Attachments feature allows you to upload files in PDF, JPG, PNG format to allow users to download these to their own device direct from your website. Simply choose the file you would like to upload, give this a name and this will be added to the page and available for download.
If you would like to restrict visibility of your page you can use your content access controls. To do this simply choose how you would like to restrict the page by selecting registered users, user groups and even individual specific users. Once you have done this, any person that tries to visit the page on your website that does not fit the specified criteria will be directed to a relevant response message to inform them why they are not able to view the page or how they can gain access. A useful tool for encouraging users to register to gain access to specific content or to preserve certain content for particular users.
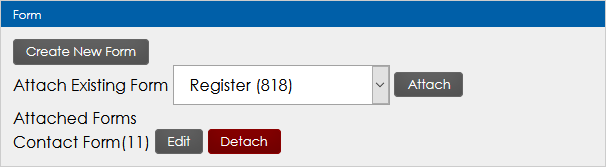
Forms allow users to complete a set of questions/fields that will be sent through to you and respond with an email confirmation to the user. Forms are great for data capture and enquiries. Some page templates will enable you to add a form to the page.
Using this control, you can select from the list of available forms you have on your website to attach the chosen form to display on the page. You can create a new form or attach an existing one. Once attached, your page will display the forms you have attached to the page.

Launch your Web Rocket
Take advantage of our FREE Digital Marketing guide.Web Rocket covers every aspect of your Digital Marketing, from preparing your business and branding, to building your website, implementing SEO, and planning your content and social media strategy. We also look at Search Engine Marketing, website analytics, email marketing and much more. Track your progress with your very own Web Rocket Action List, download free templates and resources.